· tutorials · 27 min read
Dynamic Reactivity in HTMX
HTMX is a transformative library that breathes new life into HTML, empowering it with AJAX, WebSockets, and Server Sent Events. Follow along as we atempt to harness the full potential of HTMX in building a dynamic web application.

Contents
- Foreword
- Setting up our Project
- Setting up our EJS Templates
- Setting up our Express Server
- Integrating HTMX - Adding Tasks
- Integrating HTMX - Deleting Tasks
- Integrating HTMX - Editing Tasks
- Integrating HTMX - Adding CSS Transitions
- Wrapping up
- Resources
Foreword
Prerequisites:
- Basic understanding of TypeScript
- Some familiarity with Node.js
- Some experience with Express.js
Using Node.js, TypeScript, and Express.js is not the focus of this tutorial and as such some knowledge of them is assumed. Having said that, the code we will write throughout this tutorial will be simple and should be easy to follow even if you aren’t that familiar with them.
We’re going to be using HTMX to create a simple reactive frontend, all served from a basic Express.js server. You’ll see how you can create an interactive server-sided rendered (SSR) web application that responds in real-time, with minimal reliance on frontend TypeScript.
What’s HTMX? HTMX is a library that enhances HTML with AJAX, WebSockets, and Server Sent Events capabilities, enabling us to build reactive web applications with minimal JavaScript
Why HTMX? It simplifies the process of building dynamic applications by handling server communications and DOM updates, reducing the need for complex JavaScript.
We’ll start with a simple CRUD (Create, Read, Update, Delete) application, employing Express, EJS, and HTMX. You’ll learn how to add, edit, and delete tasks seamlessly, without full page reloads, served directly from the server.
Our backend will run on TypeScript/JavaScript, with Express handling HTTP requests and delivering SSR content. While we use Express, other languages and frameworks like Python with Flask, Ruby with Rails, or PHP with Laravel are also viable options. HTMX is language and framework agnostic, making it a versatile choice for web development. JavaScript and Express were chosen for this tutorial as I believe that’s the language most readers will be familiar with.
For templating, we’ll use EJS for its ease in generating HTML markup with plain JavaScript. PicoCSS will style our app, allowing us to concentrate on HTMX’s core functionality and reduce the tedium of HTML and CSS coding. Feel free to adapt this tutorial to your preferred tools and frameworks.
Setting up our Project
Let’s start by setting up our project directory as well as initializing a node project. Follow these steps to set up the foundation of our project:
- Open your terminal and navigate to your chosen project directory.
- Run the following command to create a new
package.jsonfile:
npm init -y
- Install the necessary dependencies with npm:
npm install -D tsc nodemon express livereload connect-livereload ejs typescript ts-node @types/livereload @types/connect-livereload @types/express @types/node
- Initialize TypeScript in the project:
tsc --init
To facilitate rapid development, we’ll implement Hot Module Replacement (HMR). This feature allows for real-time updates to your modules during runtime, without needing a full page reload. We’ll utilize nodemon and tsc for this purpose. We will also use livereload to refresh the browser, but we will set that up with the Express server later.
- Add the following to your project’s package.json in the scripts section:
"scripts": {
  "dev": "nodemon --watch src --ext ts,ejs --exec ts-node --ignore '*.test.ts' --delay 0.5 src/index.ts",
},
Organize your project structure by creating the necessary directories and files:
- Create a
srcdirectory for your TypeScript files. - Within
src, create anindex.tsfile as your entry point. - Establish a
viewsdirectory for your EJS templates. - Inside
views, create anindex.ejsfile for your main template. - Add a
partialssubdirectory withinviewsto manage reusable template fragments.
Your project structure should now look like this:
- src/
    - index.ts
- views/
    - index.ejs
    - partials/
If you’re unfamilar with templating engines like ejs, utilizing partials is akin to employing components in React; they allow for code reuse across multiple templates. This practice not only promotes maintainability but also enhances the synergy with HTMX as it allows us to set up reusable HTML snippets to return from the backend or use in the frontend directly.
Setting up our EJS Templates
With our project structure in place, it’s time to craft the visual components of our application. We’ll begin by establishing the home page.
- Open the
index.ejsfile within theviewsdirectory. - Insert the following foundational HTML structure:
<!-- index.ejs -->
<!doctype html>
<html data-theme="dark">
  <head>
    <!-- PicoCSS for styling -->
    <link rel="stylesheet" href="https://cdn.jsdelivr.net/npm/@picocss/pico@2/css/pico.min.css" />
    <!-- HTMX for interactivity -->
    <script src="https://unpkg.com/htmx.org"></script>
  </head>
  <body class="container">
    <!-- Header with navigation -->
    <header id="header">
      <nav>
        <ul>
          <li><strong>HTMX Unleashed - Reactivity Demo</strong></li>
        </ul>
        <ul>
          <li><a href="/">Home</a></li>
        </ul>
      </nav>
    </header>

    <!-- Main content area -->
    <main id="main">
      <!-- Task display section -->
      <section id="tasks"><%- include('partials/task-table.ejs') %></section>

      <!-- Task control section -->
      <section id="control"><%- include('partials/add-form.ejs') %></section>
    </main>

    <!-- Footer with credits -->
    <footer id="footer">
      <small
        >Built with <a href="https://htmx.org/">HTMX</a> and
        <a href="https://picocss.com">PicoCSS</a></small
      >
    </footer>

    <!-- Inline styling for layout -->
    <style>
      #main {
        display: flex;
        gap: 1rem;
      }

      #tasks {
        flex-basis: 60%;
      }

      #control {
        flex-basis: 40%;
      }

      #footer {
        text-align: right;
      }
    </style>
  </body>
</html>
This code sets up a dark-themed home page with a header, main content area for tasks, and a footer. It includes placeholders for partials that we’ll define next.
- Create the
task-table.ejspartial to list tasks:
<!-- task-table.ejs -->
<table id="tasks-table">
  <thead>
    <tr>
      <th scope="col" style="width: 80%">Name</th>
      <th scope="col" style="width: 20%">Actions</th>
    </tr>
  </thead>
  <tbody id="tasks-body">
    <% tasks.forEach(task => { %> <%- include('task.ejs', {task: task}) %> <% }); %>
  </tbody>
</table>
- Define the
task.ejspartial for individual tasks:
<!-- task.ejs -->
<tr id="task-<%= task.id %>" class="task">
  <td><%= task.name %></td>
  <td>
    <div style="display: flex; gap: 0.25rem">
      <button>Edit</button>
      <button class="secondary">Delete</button>
    </div>
  </td>
</tr>
Each task will be displayed with options to edit or delete, which we’ll make functional with HTMX later.
Lastly, set up the add-form.ejs partial for new tasks:
<!-- add-form.ejs -->
<form id="form">
  <article>
    <header><strong>Add Form</strong></header>
    <label for="name">Task Name</label>
    <input type="text" name="name" placeholder="Name" required />
    <small id="name-helper">Enter the name of the task.</small>
    <footer>
      <button type="submit">Submit</button>
    </footer>
  </article>
</form>
This form will enable users to submit new tasks to the list.
By integrating these templates, we’ve laid out the user interface of our application. We’ll enhance these components with HTMX to enable real-time interactions and updates.
Setting up our Express Server
With our project structure and initial templates in place, it’s time to configure our Express server to serve the templates and manage our tasks:
- Open the
index.tsfile within thesrcdirectory. - Insert the following foundational Express app code:
// index.ts
import express from 'express'
import path from 'path'
import livereload from 'livereload'
import connectLiveReload from 'connect-livereload'

// Initialize express app
const app = express()
const PORT = 3000

// Create a live reload server
const liveReloadServer = livereload.createServer()

// Tell the live reload server to watch the connection to the server
liveReloadServer.server.once('connection', () => {
  setTimeout(() => {
    liveReloadServer.refresh('/')
  }, 100)
})

// Tell the express app to use the live reload middleware
app.use(connectLiveReload())

// Middleware that parses request form data
app.use(express.urlencoded({ extended: true }))

// Configure EJS as the view engine
app.set('view engine', 'ejs')

// Point the view engine to our views folder for loading our templates
app.set('views', path.join(__dirname, 'views'))

// Task array to simulate database
let tasks = [
  { id: 1, name: 'Task 1' },
  { id: 2, name: 'Task 2' },
]

// Variable to store the current ID
// This is unnecessary, but I wanted to maintain the correct IDs
let currentID = 3

// Define home route at '/' which renders our "index" ejs file in the "views" directory.
app.get('/', (_, res) => {
  res.render('index', { tasks })
})

// Start the server
app.listen(PORT, () => console.log(`Server listening on port ${PORT}`))
We initialize a live reload server to facilitate real-time updates during development. It works by injecting a script into the HTML that listens for changes and triggers a page refresh whenever the server restarts. This works in tandem with our nodemon script, which restarts the server whenever a file changes. It’s not quite Vite.. but it’ll do.
We’re using an array to store tasks, which will be rendered on the page and act as our mock database for CRUD operations. While this tutorial uses an array for simplicity, you can integrate a real database like MongoDB, PostgreSQL, or MySQL. ORMs such as Sequelize, TypeORM, or Prisma can also be used for database interactions.
Go
- To see our server in action, run the following command in your terminal:
npm run dev
Visiting http://localhost:3000 should display a page with a task table and a form for adding new tasks. If the page isn’t displaying, ensure there are no errors in the terminal and that the server is running correctly.
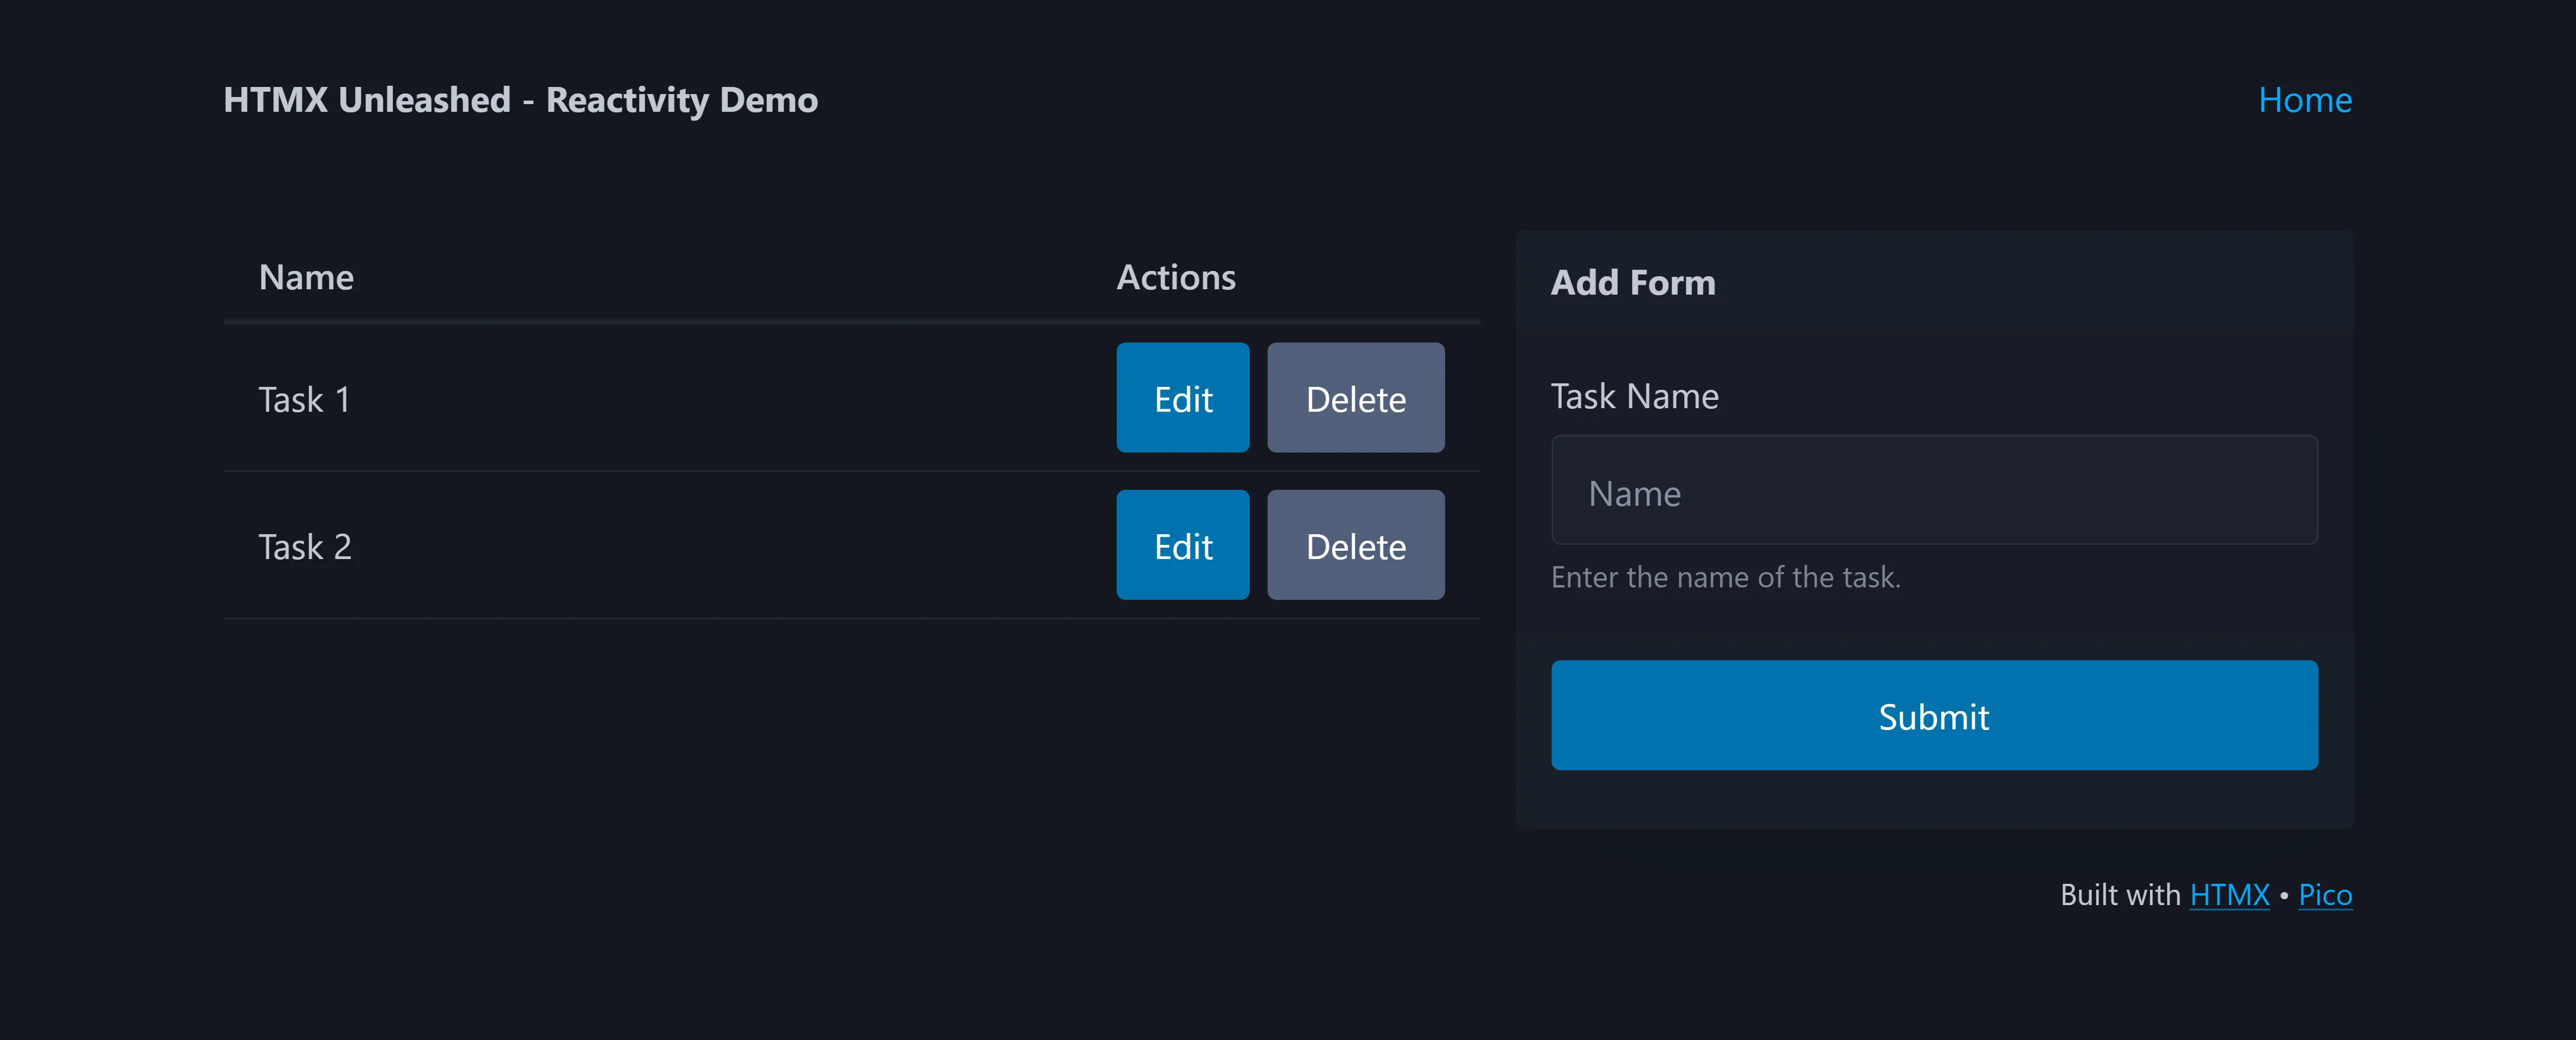
Currently, the buttons and form are static. The next step will involve bringing these elements to life with HTMX, allowing for seamless interaction without page reloads.
Integrating HTMX - Adding Tasks
With our server still up and running, it’s time to make our application interactive. This will enable us to perform CRUD operations dynamically. Let’s begin by enhancing our add-form.ejs to submit a POST request to the server:
<!-- add-form.ejs -->
<form id="form" hx-post="/tasks">
  <article>
    <header><strong>Add Form</strong></header>

    <label for="name">Task Name</label>
    <input type="text" name="name" placeholder="Name" required />
    <small id="name-helper">Enter the name of the task.</small>

    <footer>
      <button type="submit">Submit</button>
    </footer>
  </article>
</form>
By adding the hx-post attribute to the form, we instruct HTMX to send a POST request to the /tasks endpoint when the form is submitted. You can find a core list of attributes here.
Next, we’ll handle the POST request on the server by adding a /tasks route:
// index.ts

// ...previous code

// Define routes
app.get('/', (_, res) => {
  res.render('index', { tasks })
})

// Create (POST)
app.post('/tasks', (req, res) => {
  // Create task and add to tasks array
  const task = { id: currentID, ...req.body }
  tasks.push(task)

  // Increment ID
  currentID++

  // Return rendered task partial with new task data
  res.render('partials/task', { task: task })
})

// ...rest of index.ts
We’ve added a POST route to handle the form submission. When a new task is submitted, it’s added to the tasks array and the response returns the rendered task.ejs partial with the new task.
As you can see, the backend logic can remain database and ORM agnostic, allowing you to choose the most suitable database or ORM for your project. HTMX simplifies the frontend interaction by handling the HTML updates. Simply replace the array management logic with an ORM or SQL command to your database of choice.
Notice that our server responds with rendered HTML, not JSON. This is a key aspect of HTMX and SSR (Server-Side Rendering), where the server is in charge of rendering HTML. It contrasts with CSR (Client-Side Rendering), where the browser renders HTML. HTMX typically expects endpoints to return HTML, which may differ from JSON responses common in frameworks like React or Next.js.
Maintaining a JSON API alongside an HTML API is a standard practice, providing flexibility and maintainability. For this tutorial, we’re focusing solely on an HTML API, as we’re not catering to clients requiring JSON. Here’s a relevant insight from the Hypermedia Systems Book:
The existence of a hypermedia API in no way means that you can’t also have a Data API. In fact, this is a common situation in traditional web applications: there is the “web application” that is entered through that entry point URL, say https://mywebapp.example.com/. And there is also a separate JSON API that is accessible through another URL, perhaps https://api.mywebapp.example.com/v1. This is a perfectly reasonable way to split up the hypermedia interface to your application and the Data API you provide to other, non-hypermedia clients. Why would you want to include a Data API along with a hypermedia API? Well, because non-hypermedia clients might also want to interact with your application as well.
Let’s take a look at what happens now when we add a new task:
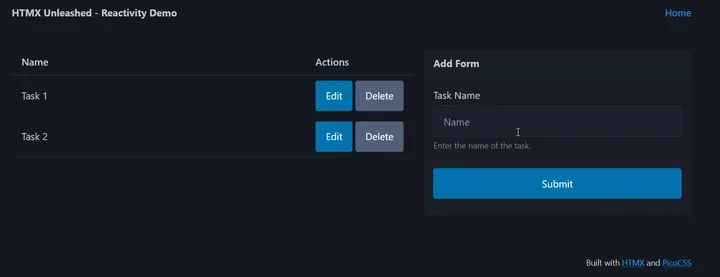
The form submits a POST request to the server, but the response is replacing the add form with the new task. By default, HTMX targets the element issuing the request for swapping. In this case, that means that the response is being swapped with our form, which is not the desired behavior. Let’s fix this by telling HTMX which target to swap with.
<!-- Adding hx-target to form, targeting #tasks-body, our task table -->
<form id="form" hx-post="/tasks" hx-target="#tasks-body">
  <article>
    <header><strong>Add Form</strong></header>

    <label for="name">Task Name</label>
    <input type="text" name="name" placeholder="Name" required />
    <small id="name-helper">Enter the name of the task.</small>

    <footer>
      <button type="submit">Submit</button>
    </footer>
  </article>
</form>
Since we gave our table body an ID of tasks-body, we can use the hx-target attribute to specify that the response should be swapped with the table body. That’s not quite what we want though, as we don’t want to replace the contents of the current table body, but rather append the new task to it. We can achieve this by using the hx-swap attribute as well.
<!-- Adding hx-swap to form, setting the swap method to be "beforeend" -->
<form id="form" hx-post="/tasks" hx-target="#tasks-body" hx-swap="beforeend">
  <article>
    <header><strong>Add Form</strong></header>

    <label for="name">Task Name</label>
    <input type="text" name="name" placeholder="Name" required />
    <small id="name-helper">Enter the name of the task.</small>

    <footer>
      <button type="submit">Submit</button>
    </footer>
  </article>
</form>
With the hx-swap attribute set to beforeend, the response will be appended to the table body, effectively adding the new task to the list. Let’s see how this works:
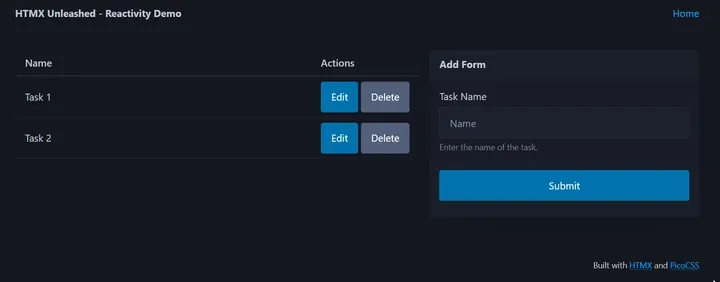
Just like that, we are manipulating the DOM directly with HTMX and server responses. No need to diff the DOM or to render multiple elements for comparison under the hood. Just direct, surgical DOM changes based directly on hypermedia properties (hx-target, hx-swap, etc).
The form submits a POST request to the server, and the response is appended to the table body. However, the form does not reset after submission, which is not the desired behavior. We can fix this by adding an event listener to the form that resets it after submission. HTMX provides a way to do this with the hx-on attribute.
<form
  id="form"
  hx-post="/tasks"
  hx-swap="beforeend"
  hx-target="#tasks-body"
  hx-on::after-request="this.reset()"
>
  <article>
    <header><strong>Add Form</strong></header>

    <label for="name">Task Name</label>
    <input type="text" name="name" placeholder="Name" required />
    <small id="name-helper">Enter the name of the task.</small>

    <footer>
      <button type="submit">Submit</button>
    </footer>
  </article>
</form>
With the hx-on::after-request attribute, we can specify an event listener to reset the form after the request is complete. Let’s see how this works:
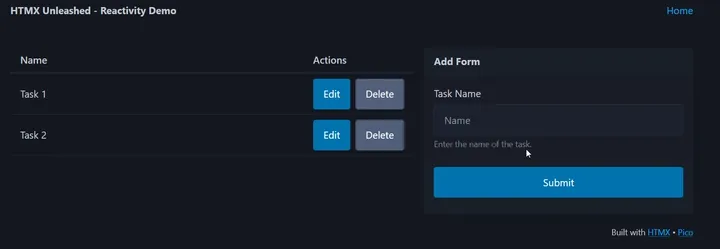
Now when we submit a successful form, the response is appended to the table body, and the form resets, ready for a next task to be added.
Integrating HTMX - Deleting Tasks
We’ll now incorporate HTMX into our task list to enable task deletion without page reloads. Let’s update task.ejs to add HTMX attributes to our delete button:
<tr id="task-<%= task.id %>" class="task">
  <td><%= task.name %></td>

  <td>
    <div style="display: flex; gap: 0.5rem">
      <button>Edit</button>

      <button class="secondary" hx-delete="/tasks/<%= task.id %>" hx-target="closest tr">
        Delete
      </button>
    </div>
  </td>
</tr>
Let’s break it down:
hx-delete="/tasks/<%= task.id %>"triggers a DELETE request to /tasks/:id when clicked.hx-target="closest tr": specifies the closesttras the target element for the swap. We also could have usedhx-target="#task-<%= task.id %>"to target the specific task row.
On the server side, we’ll handle the DELETE request to remove the task:
// index.ts

// ...previous code

// ...POST route

// Delete (DELETE)
app.delete('/tasks/:id', (req, res) => {
  // Get the ID from the request params
  const id = Number(req.params.id)

  // Filter out the given ID
  tasks = tasks.filter((task) => task.id !== id)

  res.send('')
})

// ...rest of index.ts
This route parses the task ID, filters out the task from our list, and sends an empty response, which HTMX uses to perform the DOM update.
Let’s see how this performs:
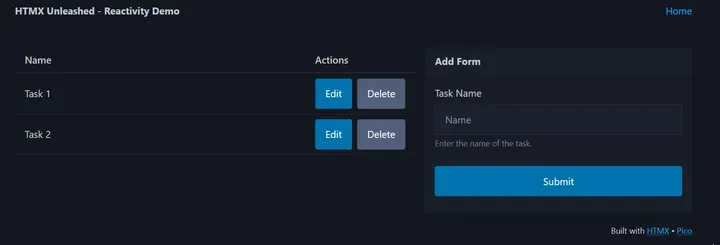
Now, when we click the delete button, the task is removed from the list without a page reload. If you’re following along and happened to inspect the DOM, you might have noticed a slight issue with our markup. Here’s how our tbody element reads after deleting Task 1 and Task 2:
<tbody id="tasks-body">
  <tr id="task-1" class="task"></tr>
  <tr id="task-2" class="task"></tr>
</tbody>
The tr elements are still present in the DOM, but they are empty. This is not a problem for our application, but it’s not ideal. This is happening because on our delete button, we did not specific any method for hx-swap. By default, hx-swap is set to innerHTML, which replaces the inner HTML of the target element with the response. We can fix this by setting hx-swap to outerHTML to replace the target element itself. Let’s update our delete button to reflect this:
<!-- task.ejs -->
<tr id="task-<%= task.id %>" class="task">
  <td><%= task.name %></td>

  <td>
    <div style="display: flex; gap: 0.5rem">
      <button>Edit</button>

      <button
        class="secondary"
        hx-delete="/tasks/<%= task.id %>"
        hx-swap="outerHTML"
        hx-target="closest tr"
      >
        Delete
      </button>
    </div>
  </td>
</tr>
Now when we delete a task, the tr element is removed from the DOM, leaving us with a clean and tidy table:
<tbody id="tasks-body"></tbody>
Integrating HTMX - Editing Tasks
Now that we can add and delete tasks, let’s add HTMX to our task list to edit tasks without refreshing the page. Let’s start by updating our task.ejs to add HTMX to the edit button:
<!-- task.ejs -->
<tr class="task" id="task-<%= task.id %>">
  <td><%= task.name %></td>

  <td>
    <div style="display: flex; gap: 0.5rem">
      <button hx-get="/html/edit-form/<%= task.id %>" hx-swap="outerHTML" hx-target="#form">
        Edit
      </button>

      <button
        class="secondary"
        hx-delete="/tasks/<%= task.id %>"
        hx-swap="outerHTML"
        hx-target="closest tr"
      >
        Delete
      </button>
    </div>
  </td>
</tr>
Let’s break these additions down:
hx-get="/html/edit-form/<%= task.id %>"sends a GET request to the server when the button is clicked.hx-target="#form"tells HTMX to target the#formelement when updating the DOM with the returned response.hx-swap="outerHTML"tells HTMX to replace the form with the response from the server.
In order to make these work, we need to create an edit form. Let’s create a new file called edit-form.ejs in the partials directory and add the following code:
<!-- edit-form.ejs -->
<form id="form">
  <article>
    <header>
      <strong>Editing <%= task.title %> (ID: <%= task.id %>)</strong>
    </header>

    <label for="name">Task Name</label>
    <input type="text" name="name" placeholder="Name" value="<%= task.name %>" required />
    <small id="name-helper">Enter the name of the task.</small>

    <footer style="display: flex; gap: 0.5rem">
      <button role="group" style="justify-content: center" class="secondary">Cancel</button>
      <button role="group" style="justify-content: center" type="submit">Submit</button>
    </footer>
  </article>
</form>
We’ll also need to add a route to our server to handle the GET request for the edit form, which is being called by our edit button in task.ejs. In the index.ts file, add the following route:
// index.ts

// ...previous code

// ...POST and DELETE routes

app.get('/html/edit-form/:id', (req, res) => {
  const id = Number(req.params.id)
  const task = tasks.filter((task) => task.id === id)

  res.render('partials/edit-form', { task: task[0] })
})

// ...rest of index.ts
Now, when we click the edit button for a given task the appropriate edit form should render in place of the add form. Let’s see how this works:
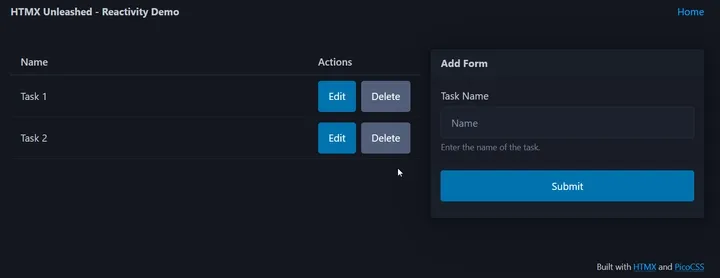
Now that we have the edit form rendering, we need to handle the functionality and interactivity of it.
Currently, clicking the cancel button triggers a form submission due to native behavior. This unintentionally refreshes the page, displaying the add form again. While we want the add form to appear upon cancellation, we need a more efficient method to achieve this.
Let’s fix this by updating our edit-form.ejs file:
<!-- edit-form.ejs -->
<form id="form">
  <article>
    <header>
      <strong>Editing <%= task.title %> (ID: <%= task.id %>)</strong>
    </header>

    <label for="name">Task Name</label>
    <input type="text" name="name" placeholder="Name" value="<%= task.name %>" required />
    <small id="name-helper">Enter the name of the task.</small>

    <footer style="display: flex; gap: 0.5rem">
      <button
        role="group"
        style="justify-content: center"
        class="secondary"
        hx-get="/html/add-form"
        hx-target="#form"
        hx-swap="outerHTML"
      >
        Cancel
      </button>

      <button role="group" style="justify-content: center" type="submit">Submit</button>
    </footer>
  </article>
</form>
Let’s break down the changes:
hx-get="/html/add-form"sends a GET request to the server when the button is clicked.hx-target="#form"tells HTMX to target the#formelement when updating the DOM with the returned response.hx-swap="outerHTML"tells HTMX to replace the form with the response from the server.
We also need to add the route to our server to handle the GET request for the add form:
// index.ts

// ...previous code

// ...edit-form route

app.get('/html/add-form', (_, res) => {
  res.render('partials/add-form')
})

// ...rest of index.ts
Now when we click the cancel button, the add form should render in place of the edit form. Let’s see how this works:
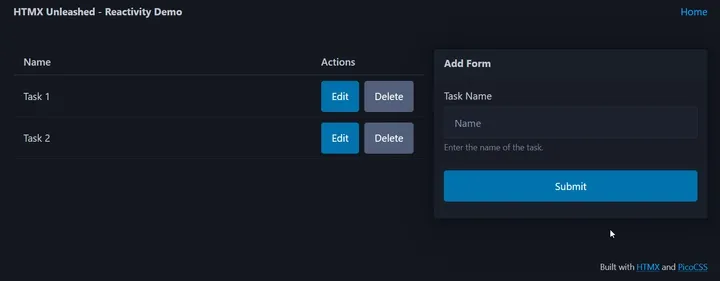
Now that we have a functioning way of rendering the edit form and cancelling it, we need to handle the form submission. Let’s update our edit-form.ejs file to handle the form submission:
<!-- edit-form.ejs -->
<form id="form" hx-put="/tasks/<%= task.id %>" hx-swap="outerHTML" hx-target="#task-<%= task.id %>">
  <article>
    <header>
      <strong>Editing <%= task.title %> (ID: <%= task.id %>)</strong>
    </header>

    <label for="name">Task Name</label>
    <input type="text" name="name" placeholder="Name" value="<%= task.name %>" required />
    <small id="name-helper">Enter the name of the task.</small>

    <footer style="display: flex; gap: 0.5rem">
      <button
        role="group"
        style="justify-content: center"
        class="secondary"
        hx-get="/html/add-form"
        hx-target="#form"
        hx-swap="outerHTML"
      >
        Cancel
      </button>

      <button role="group" style="justify-content: center" type="submit">Submit</button>
    </footer>
  </article>
</form>
Let’s break down the changes:
hx-put="/tasks/<%= task.id %>"sends a PUT request to the server when the form is submitted.hx-target="#task-<%= task.id %>"tells HTMX to target the#task-<%= task.id %>element when updating the DOM with the returned response.hx-swap="outerHTML"tells HTMX to replace the#task-<%= task.id %>element with the response from the server.
Hopefully most of this syntax is starting to look familiar. We also need to update our server to handle the PUT request and update the task:
// index.ts

// ...previous code

// ...POST and DELETE routes

// Update (PUT)
app.put('/tasks/:id', (req, res) => {
  const id = Number(req.params.id)
  const updatedTask = { id, ...req.body }
  tasks = tasks.map((task) => (task.id === id ? updatedTask : task))

  res.render('partials/task', { task: updatedTask })
})

// ...rest of index.ts
To verify these updates, edit a task in the application. The task should update in the list without requiring a page refresh. If the update isn’t visible, check for errors in the terminal and ensure the server is operational.
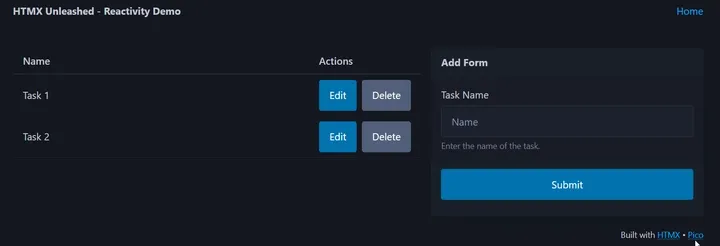
Currently, after editing a task, the edit form remains visible. While users can manually revert to the add form, a more user-friendly approach is to automate this process. Implementing auto-removal of the edit form post-update enhances the application’s usability.
We could use inline HTMX attributes to set up event listeners and logic to get this done, however.. I’m not a huge fan of long inline functions. So instead of writing all the logic inline, let’s use this as an opportunity to explore how to combine JavaScript (or TypeScript) with HTMX.

- Add the following script to the index.ejs template
<!-- Add the following script to the bottom of the index.ejs file html body -->
<script>
  const handleRequest = (event) => {
    // Retrieve the request details from the event
    const { target, requestConfig, xhr } = event.detail

    // If an OK (200) Status
    if (xhr.status === 200) {
      // To avoid swaps as a result of requests that aren't "PUT" aka edits
      if (requestConfig.verb === 'put') {
        swapToAddForm()
      }
    }
  }

  const swapToAddForm = () => {
    // Fetch the add-form and swap it with the current form
    htmx.ajax('GET', '/html/add-form', {
      target: '#form',
      swap: 'outerHTML',
    })
  }

  // Listen for the afterRequest event
  document.body.addEventListener('htmx:afterRequest', handleRequest)
</script>
We’ve added a script to listen for the htmx:afterRequest event, which as it suggests is triggered after an HTMX request is completed. If the request was a successful PUT operation, it triggers an AJAX request to fetch and display the add form, effectively removing the edit form.
HTMX differs from JavaScript frameworks like React, which rely on virtual DOM and diffing algorithms for updates. HTMX’s approach is to make precise changes to the DOM, reducing complexity and potential performance issues. This method is advantageous for most scenarios, offering direct and efficient DOM updates.
However, combining JavaScript with HTMX can be powerful for applications requiring more intricate interactions. This hybrid approach can provide the best of both worlds: HTMX’s simplicity and JavaScript’s flexibility for complex tasks.
Let’s see how this works:
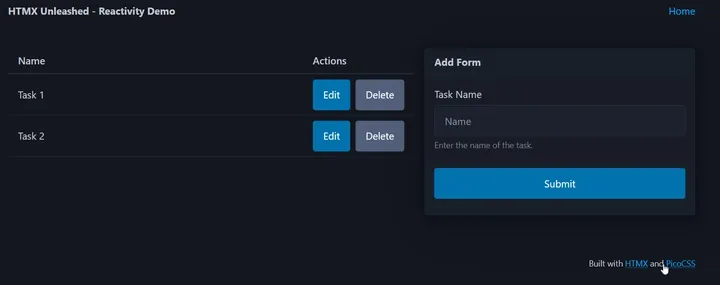
Now when we edit a task, the edit form is replaced with the add form, providing a great user experience.
Integrating HTMX - Adding CSS Transitions
HTMX simplifies adding and removing elements from the DOM, but it doesn’t include transitions by default. However, it does provide classes that we can leverage to create smooth transitions for an even better user experience.
When HTMX adds an element, it assigns the htmx-added class, and when removing, it assigns htmx-swapping. These classes can be targeted in CSS to apply transitions, providing visual cues to users during DOM updates. Let’s implement transitions for the #form and .task elements in our application.
- Let’s add some css to our index.ejs in our existing style block
<!-- index.ejs -->

<!-- ...previous code -->

<style>
  /* ...previous styles */

  /* Transition styles for tasks */
  .task {
    opacity: 1;
    transition: opacity 0.5s ease-in-out;
  }

  .task.htmx-added {
    opacity: 0;
  }

  .task.htmx-swapping {
    opacity: 0;
  }

  /* Transition styles for forms */
  #form {
    opacity: 1;
    transition: opacity 0.5s ease-in-out;
  }

  #form.htmx-added {
    opacity: 0;
  }

  #form.htmx-swapping {
    opacity: 0;
  }
</style>

<!-- ...rest of index.ejs -->
We’ve introduced transitions for the opacity property to fade elements smoothly. The .task and #form elements now have transitions triggered by their respective HTMX classes.
Currently, there are a few challenges with our transitions:
- Edit Form Submission: The event listener doesn’t wait for the form’s fade-out animation before swapping it with the add form, leading to an abrupt removal.
- Task Removal: Tasks disappear instantly without a transition.
- Edit Form Addition: The edit form appears suddenly
- Cancel Button: “Cancel” button doesn’t trigger a fade-out.
To address these, we can synchronize the hx-swap attribute with our transition duration.
First, let’s modify the event listener in index.ejs to delay the swap of the edit form post-update:
<!-- index.ejs -->

<!-- ...previous code -->

<script>
  const handleRequest = (event) => {
    const { target, requestConfig, xhr } = event.detail

    if (xhr.status === 200) {
      if (requestConfig.verb === 'put') {
        return swapToAddForm()
      }
    }
  }

  const swapToAddForm = () => {
    // Fetch the add-form and swap it with the current form
    htmx.ajax('GET', '/html/add-form', {
      target: '#form',
      swap: 'outerHTML swap:0.5s', // Delay the swap by 0.5 seconds
    })
  }

  // Listen for the afterRequest event
  document.body.addEventListener('htmx:afterRequest', handleRequest)
</script>

<!-- ...rest of index.ejs -->
We’ve added a swap:0.5s delay to the swap of the edit form. This allows us to see the CSS transition when the edit form is removed from the DOM by our listener. We also need to add a delay to the swap of the task when removing a task from the DOM and when adding the edit form for a given task to the DOM. We also need to update the cancel button in the edit-form.ejs file to add a delay to the swap of the edit form when cancelling. Let’s start there:
<!-- edit-form.ejs -->

<!-- ...previous code -->

<footer>
  <button
    role="group"
    class="secondary"
    hx-get="/partials/add-form"
    hx-target="#form"
    hx-swap="outerHTML swap:0.5s"
  >
    Cancel
  </button>

  <button role="group" type="submit">Submit</button>
</footer>

<!-- ...rest of edit-form.ejs -->
Now, let’s update the task.ejs file to add a delay to the swap of the task when removing a task from the DOM and when adding the edit form for a given task to the DOM:
<!-- task.ejs -->
<tr class="task" id="task-<%= task.id %>">
  <td><%= task.name %></td>

  <td>
    <div style="display: flex; gap: 0.5rem">
      <button
        hx-get="/html/edit-form/<%= task.id %>"
        hx-swap="outerHTML swap:0.5s"
        hx-target="#form"
      >
        Edit
      </button>

      <button
        class="secondary"
        hx-delete="/tasks/<%= task.id %>"
        hx-swap="outerHTML swap:0.5s"
        hx-target="closest tr"
      >
        Delete
      </button>
    </div>
  </td>
</tr>
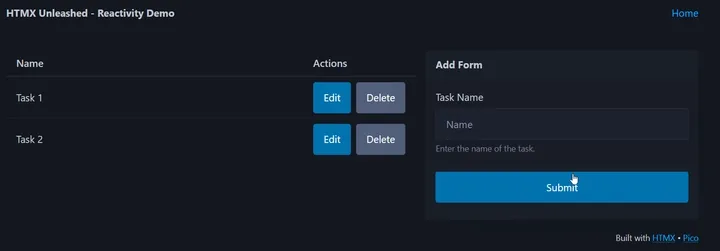
With these transitions in place, users will now see a smooth fade effect when tasks are added or removed from the DOM. This not only improves the overall user experience but also makes the application feel more polished and responsive.
Wrapping up
Throughout this tutorial, we’ve constructed a CRUD application using Express, EJS, and HTMX. By leveraging HTMX, we’ve enabled dynamic interactions such as adding, editing, and deleting tasks without page reloads. The addition of CSS transitions has further refined the user interface, providing a more engaging experience.
HTMX stands out as a powerful tool for building dynamic web applications efficiently. It simplifies the creation of reactive interfaces without relying heavily on JavaScript, which can streamline development and maintenance. When necessary, HTMX can be paired with JavaScript to handle more complex interactions.
Resources
- HTMX - Explore HTMX, a transformative library that breathes new life into HTML, empowering it with AJAX, WebSockets, and Server Sent Events.
- Hypermedia Systems Book - Read the Hypermedia Systems Book, a comprehensive guide to building web applications with HTMX and other modern web technologies.
- Express.js - Learn more about Express.js, a fast, unopinionated, and minimalist web framework for Node.js.
- EJS - Explore EJS, a simple templating language that lets you generate HTML markup with plain JavaScript.
- PicoCSS - Discover PicoCSS, a minimalistic CSS framework.

